


How to Use Virtual Audio Cable: Complete 2025 Guide for Streaming, Gaming & Audio Production
Master virtual audio routing with this practical tutorial covering installation, setup, and real-world applications
Table of Contents
- What is Virtual Audio Cable?
- Best Virtual Audio Cable Software in 2025
- Step-by-Step Installation Guide
- How to Set Up Virtual Audio Cable for Different Applications
- Advanced Configuration & Troubleshooting
- Professional Tips & Best Practices
What is Virtual Audio Cable? Understanding Virtual Audio Routing
Virtual Audio Cable (VAC) creates virtual audio devices on your computer, letting you route audio between applications without physical hardware connections. Picture it as an invisible digital cable connecting one app's audio output to another app's audio input.
How Virtual Audio Cable Works
When you install virtual audio cable software, it adds two virtual devices to your system:
- Cable Input(Playback Device): Where apps send audio
- Cable Output(Recording Device): Where apps receive audio
This digital bridge lets multiple applications share audio streams, mix different sources, and route audio with zero quality loss since everything stays digital.
Why Use Virtual Audio Cable?
For Content Creators:
- Mix game audio, microphone, and music for streaming
- Route specific audio to OBS Studio without capturing all desktop sounds
- Create professional podcast recordings with multiple audio sources
For Remote Work:
- Share computer audio in Zoom, Discord, or Microsoft Teams meetings
- Route presentation audio directly to video calls
- Mix microphone and system audio for webinars
For Audio Professionals:
- Record computer playback directly into DAWs like Audacity or Reaper
- Chain multiple audio applications for complex processing workflows
- Achieve bit-perfect digital recording without analog conversion
Best Virtual Audio Cable Software in 2025: Complete Comparison
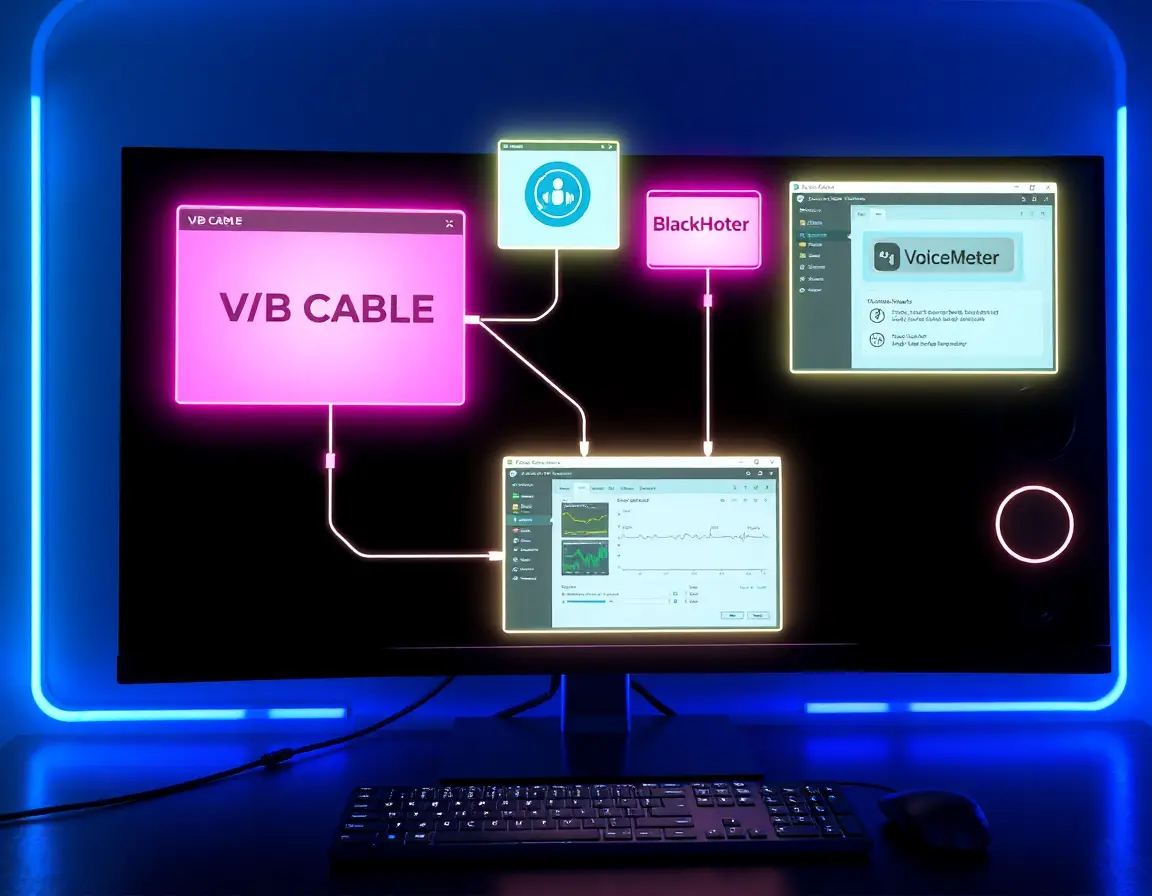
VB-CABLE: Best for Beginners
Key Features:
- Single virtual audio cable
- Supports all Windows audio interfaces (MME, DirectX, KS, WASAPI)
- Donationware model (free to use)
- Cross-platform (Windows, macOS)
Best For: Simple audio routing, streaming beginners, basic Discord/Zoom audio sharing
Pros:
- Zero-configuration setup
- Lightweight and stable
- Great community support
Cons:
- Limited to one cable (expandable with donations)
- Basic functionality only
Virtual Audio Cable by Muzychenko: Professional Choice
Key Features:
- Up to 256 virtual cables
- Advanced Audio Repeater utility
- High-resolution audio support (384kHz, 32-bit)
- Detailed documentation
Best For: Professional audio engineers, complex routing setups, advanced users
Pros:
- Unlimited configuration possibilities
- Detailed technical documentation
- Professional-grade features
Cons:
- Steeper learning curve
- Trial version has voice reminders
- More expensive than alternatives
BlackHole: macOS Champion
Key Features:
- Zero additional latency
- Open-source development
- Multiple channel configurations (2, 16, 64 channels)
- Native macOS integration
Best For: Mac users, music production, low-latency applications
Pros:
- Truly zero latency
- Free and open-source
- Active community development
Cons:
- macOS only
- Requires Audio MIDI Setup knowledge
- No built-in mixing interface
VoiceMeeter: Virtual Mixing Console
Key Features:
- Real-time audio mixing interface
- Multiple input/output channels
- Built-in EQ and compression
- Works with VB-CABLE for expanded routing
Best For: Live streaming, podcasting, content creation requiring real-time mixing
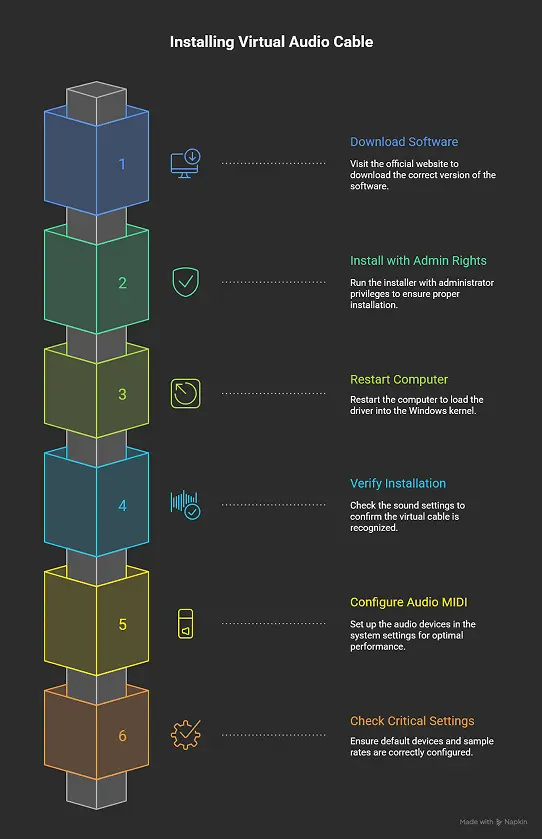
Step-by-Step Installation Guide: How to Install Virtual Audio Cable
Windows Installation (VB-CABLE)
Step 1: Download from Official Source
- Visit vb-audio.com/Cable/
- Download the right version (32-bit or 64-bit)
- Verify file integrity to avoid malware
Step 2: Install with Administrator Rights
- Extract downloaded ZIP file
- Right-click VBCable_Setup_x64.exe
- Select "Run as administrator"
- Click "Install Driver"
- Wait for installation completion
Step 3: Mandatory Restart
- Restart your computer right after installation
- This loads the driver correctly into Windows kernel
- Skip this step = guaranteed audio issues
Step 4: Verify Installation
- Open Windows Sound Settings (Win + I > System > Sound)
- Look for "CABLE Input" in playback devices
- Look for "CABLE Output" in recording devices
macOS Installation (BlackHole)
Step 1: Download and Install
- Download BlackHole from GitHub
- Run BlackHole.X.installer.pkg
- Enter admin password when prompted
- Allow installation in Security & Privacy settings
Step 2: Configure Audio MIDI Setup
- Open Audio MIDI Setup (Applications > Utilities)
- Click "+" and select "Create Multi-Output Device"
- Add BlackHole and your speakers
- Set as default output in System Preferences
Post-Installation Configuration
Critical Settings Check:
- Default Device Management: Windows may auto-set virtual cable as default - change it back to your speakers
- Sample Rate Matching: Set all devices to same sample rate (48kHz recommended)
- Buffer Size Optimization: Start with medium buffers, adjust based on performance
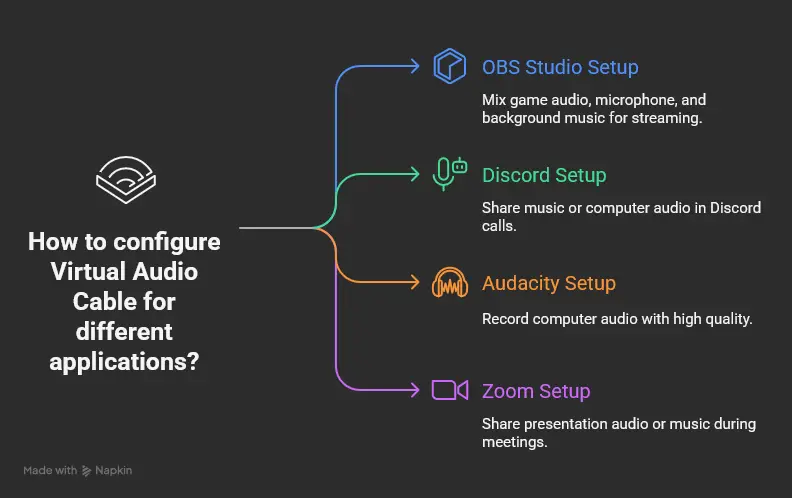
How to Set Up Virtual Audio Cable for Different Applications
Setup #1: How to Use Virtual Audio Cable with OBS Studio for Streaming
Goal: Mix game audio, microphone, and background music into one stream
Configuration Steps:
- Route Game Audio
Windows Settings > Sound > App Volume and Device Preferences
Find your game > Output Device > CABLE Input
- Route Background Music
Open Spotify/iTunes
Windows Volume Mixer > Select app > Output Device > CABLE Input
- Configure OBS Studio
OBS Settings > Audio
Desktop Audio Device > CABLE Output
Mic/Auxiliary Audio Device > Your Physical Microphone
Result: OBS captures mixed game + music audio while keeping your microphone separate for independent volume control.
Setup #2: Virtual Audio Cable Discord Setup for Voice Chat
Goal: Share music or computer audio in Discord calls
Configuration Method 1: Microphone + Music Mix
- Windows Sound Settings > Microphone Properties > Listen Tab
- Check "Listen to this device"
- Playback through: CABLE Input
- Set music player output to CABLE Input
- Discord Settings > Voice & Video > Input Device > CABLE Output
Configuration Method 2: Push-to-Talk Music Sharing
- Create separate keybind in Discord
- Route music to CABLE Input
- Use CABLE Output as secondary input device
- Switch between microphone and music with hotkeys
Setup #3: How to Record Computer Audio with Audacity
Goal: Capture browser audio, software instruments, or streaming content
Setup Process:
- Browser/Application Output > CABLE Input
- Audacity Preferences > Devices
- Host: Windows WASAPI (recommended for quality)
- Recording Device: CABLE Output
- Playback Device: Your speakers/headphones
Monitoring Setup:
CABLE Output Properties > Listen Tab
Check "Listen to this device"
Playback through: Your physical audio device
Pro Tip: Use WASAPI host for lowest latency and highest quality digital recording.
Setup #4: Virtual Audio Cable Zoom Configuration
Goal: Share presentation audio or music during meetings
Basic Setup:
- Presentation/Media Player > Output > CABLE Input
- Microphone > Listen > CABLE Input (if mixing with voice)
- Zoom Audio Settings > Microphone > CABLE Output
- Test audio before important meetings
Advanced Multi-Source Setup:
Use VoiceMeeter for real-time mixing:
- Route microphone to VoiceMeeter input
- Route presentation audio to VoiceMeeter input
- Set Zoom input to VoiceMeeter output
- Control levels in real-time during presentation
Advanced Configuration & Troubleshooting
Solving Common Virtual Audio Cable Problems
Problem #1: No Sound After Installation
Symptoms: Applications show audio activity but no sound output
Diagnostic Steps:
- Check Signal Flow:Source App → CABLE Input → CABLE Output → Target App
- Verify Windows Default Devices:Check if speakers weren't changed to virtual cable
- Test with Audio Repeater:Use built-in repeater to confirm cable functionality
Solutions:
- Manually set output devices in Windows Volume Mixer
- Reset default playback device to physical speakers
- Restart audio services: services.msc → Windows Audio → Restart
Problem #2: Audio Latency and Stuttering
Root Causes:
- Mismatched sample rates between devices
- Wrong buffer sizes
- High CPU load during audio processing
Optimization Steps:
- Unify Sample Rates:
- Set all audio devices to 48000 Hz
- Windows Sound Settings > Device Properties > Advanced
- Buffer Size Tuning:
- Start with 512 samples (medium latency)
- Decrease for lower latency, increase for stability
- Monitor for dropouts and adjust accordingly
- System Optimization:
- Close unnecessary applications
- Use Task Manager to identify CPU bottlenecks
- Consider audio interface ASIO drivers for professionals
Problem #3: Echo and Feedback Loops
Common Causes:
- "Listen to this device" configured incorrectly
- Multiple audio paths creating loops
- Physical microphone picking up speakers
Resolution Strategy:
- Audit All Listen Settings:
- Check every audio device properties
- Disable unnecessary "Listen to this device" options
- Map Audio Flow:
- Document every connection: App A → Device B → App C
- Identify and break circular routing
- Physical Setup:
- Use headphones instead of speakers
- Position microphone away from audio sources
- Adjust microphone gain to prevent pickup
Performance Optimization Tips
CPU Load Management
- Audio Thread Priority:
- Set audio applications to "High" priority in Task Manager
- Avoid "Realtime" unless absolutely necessary
- Power Management:
- Use "High Performance" power plan during audio work
- Disable USB selective suspend for audio devices
- Background Processes:
- Disable Windows audio enhancements
- Close web browsers with many tabs during critical audio work
Quality Settings Optimization
- Bit Depth and Sample Rate:
- 24-bit/48kHz for professional work
- 16-bit/44.1kHz sufficient for streaming/gaming
- Audio Interface Selection:
- WASAPI: Best for modern Windows applications
- ASIO: Professional audio interfaces only
- DirectSound: Legacy compatibility
Professional Tips & Best Practices
Virtual Audio Cable Best Practices for Content Creators
Streaming Optimization
- Multi-Cable Setup:Use separate cables for different audio sources
- Backup Routing:Always have direct microphone input as backup
- Level Management:Set consistent levels across all sources
- Testing Protocol:Test full audio chain before going live
Podcast Production Workflow
Recording Setup:
- Guest audio → Cable 1 → DAW Track 1
- Host microphone → Physical input → DAW Track 2
- Background music → Cable 2 → DAW Track 3
- Call audio → Cable 3 → DAW Track 4
Professional Audio Engineering
- Signal Monitoring:Use spectrum analyzers at each stage
- Gain Staging:Maintain optimal levels throughout chain
- Backup Systems:Physical hardware backup for critical applications
- Documentation:Map all virtual routing for troubleshooting
Security and Stability Considerations
Driver Management
- Keep virtual audio drivers updated
- Create system restore points before driver changes
- Maintain spare physical audio interfaces for emergencies
System Integration
- Test compatibility with major Windows updates
- Document working configurations for quick restoration
- Consider virtual machines for testing new setups
Final Thoughts
Virtual Audio Cable transforms your computer into a flexible audio routing hub, enabling professional-quality content creation without expensive hardware. Whether you're streaming on Twitch, conducting Zoom presentations, or producing podcasts, mastering these techniques will significantly upgrade your audio workflow.
Key Takeaways:
- Choose software based on your complexity needs: VB-CABLE for simplicity, VAC for power, BlackHole for Mac
- Always restart after installation and verify device recognition
- Map your audio signal flow before configuring applications
- Start with basic setups and gradually add complexity as needed
- Maintain consistent sample rates and optimize buffer sizes for your system
Next Steps:
- Install and test basic virtual audio cable functionality
- Implement one primary use case (streaming, recording, or video calls)
- Gradually expand to more complex multi-source routing
- Develop troubleshooting skills through experimentation
- Create documented configurations for quick setup restoration
By following this practical guide, you'll join content creators and audio professionals who leverage virtual audio routing to achieve studio-quality results from standard computer setups.