Top 10 Microphone Cable Types for Optimal Sound Quality?
In the world of audio production, the choice of a microphone cable can significantly influence sound quality. Renowned audio engineer Mike Adams once said, "The right cable makes all the difference in capturing the perfect sound." This sentiment captures the essence of why selecting the appropriate microphone cable is crucial for any recording artist or sound technician.
Microphone cables come in various types, each designed for specific purposes. Understanding these differences can be overwhelming. However, selecting the right cable can enhance your recordings, allowing for a clearer and more vibrant sound. The nuances in cable construction, shielding, and connectors affect audio clarity and interference levels.
For professionals, investing time in exploring microphone cable options can lead to greater success in their projects. Many might overlook these intricacies, but they play a vital role in the sound chain. As you delve into this guide, consider how each cable type functions and the unique benefits it offers. Optimizing sound quality starts with understanding these essential components.
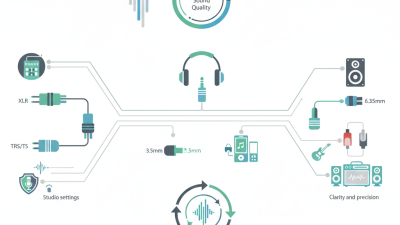
Types of Microphone Cables Based on Connector Specifications
When choosing microphone cables, connector specifications play a crucial role in sound quality.
XLR connectors are a standard choice in professional audio environments. These three-pin connectors provide balanced audio transmission, reducing noise interference. According to industry reports, using XLR cables can improve sound clarity by up to 20%.
TRS connectors are another popular option, especially among musicians. They offer a 1/4-inch option for semi-professional and home setups. These connectors support unbalanced audio. Therefore, they may lead to more noise in longer runs. While convenient, the potential quality loss can be significant. Data suggests that users may experience a 15% drop in clarity over long distances with TRS.
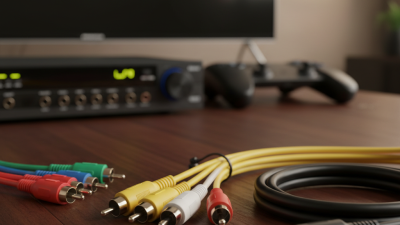
Another connector type is the RCA, commonly used in consumer electronics. While not ideal for professional audio, they are widely accessible.
RCA cables can result in sound degradation with long cable runs. The depth of sound can suffer, leading to less accurate audio reproduction. Choosing the right connector is critical for achieving optimal sound quality. Understanding these nuances can help in making informed decisions.
Factors Affecting Sound Quality in Microphone Cables
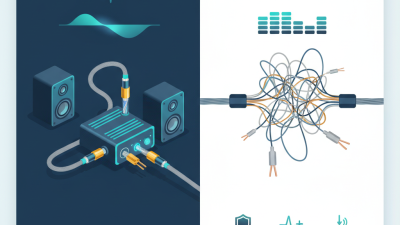
When selecting microphone cables, various factors significantly influence sound quality. First, the cable's construction plays a crucial role. High-quality materials, such as oxygen-free copper, reduce resistance and enhance signal clarity. According to industry standards, cables with lower capacitance levels maintain audio integrity, providing clearer sound reproduction. Cables with a capacitance of less than 100 pF/m are often recommended for optimal performance.
Shielding is another vital aspect. Cables with multiple layers of shielding minimize interference from electromagnetic signals. This is particularly important in environments with numerous electronic devices. Reports indicate that properly shielded cables can reduce noise by up to 90%. Additionally, the connectors used on the cables can impact overall sound quality. Poor-quality connectors lead to signal loss and hinder sound fidelity.
While twist rates and length matter, they often receive less attention. A shorter cable with a proper twist can preserve sound quality better than a longer, poorly designed counterpart. Professionals note that lengths beyond 25 feet can introduce latency and degrade audio quality. Thus, it’s essential to balance ambition with practical cable choices. Understanding these factors helps in making informed decisions for optimal sound capture.
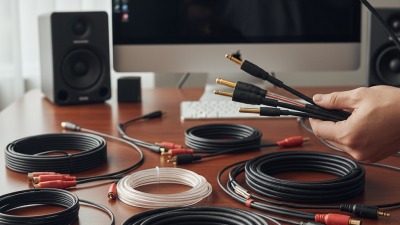
Comparison of Shielding Techniques in Microphone Cables
When selecting microphone cables, shielding techniques significantly impact sound quality. Shielding protects the audio signal from interference. There are various shielding methods, each with unique strengths and weaknesses.
Braided shielding is a common choice. It uses threads woven around the cable. This creates a robust defense against electromagnetic interference. However, braided shields can add weight and flexibility issues. Foil shielding, on the other hand, employs a thin layer of aluminum. It's lightweight and flexible but less effective against low-frequency interference. A combination of both types can offer a balanced solution for optimal sound quality.
Tip: Look for cables with a combination of foil and braided shielding for versatility.
Consider your environment when choosing shielding. If you record in a noisy place, prioritizing a robust shield is wise. Keep in mind that thicker cables may impede movement. They can create tangles during set-up. Finding a balance between durability and flexibility matters greatly.
Tip: Shorter cables often perform better. Longer cables may introduce noise or signal loss. Always test your cables in different settings to ensure reliability.
Best Practices for Choosing Microphone Cable Length
Choosing the right microphone cable length is crucial for achieving optimal sound quality. Too long, and you risk losing signal integrity. Too short, and you might struggle to connect your equipment properly. Understanding your setup is vital. For instance, if you perform in larger venues, longer cables may be necessary. However, consider the potential signal degradation over long distances.
When selecting cable length, evaluate your specific needs. Check both the distance to your mixing console and any obstacles in the way. Aim for a length that allows movement without excess slack. Commonly, a 10 to 25-foot cable suffices for most situations. But, in some cases, shorter lengths may yield clearer sound. If you're in a permanent studio setup, precise lengths can help maintain a tidy workspace.
Don't overlook the quality of connectors and cable materials. Inferior options might compromise signal quality, regardless of the length. Balancing cable length and quality can enhance your recording experience. If you frequently face issues, reflect on your current setup. It's worth revisiting your choices to ensure the best possible outcome.
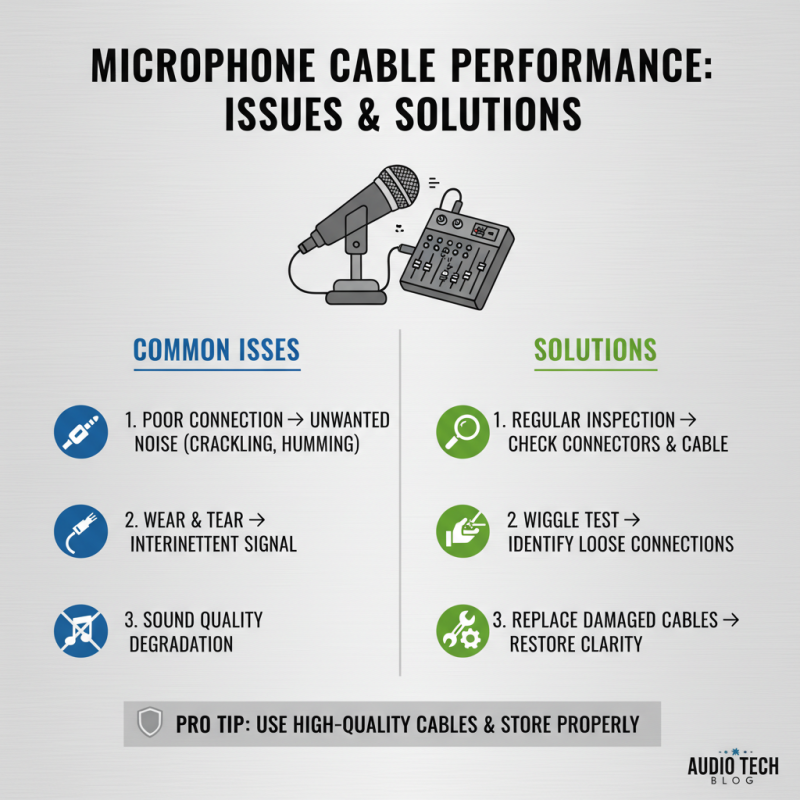
Common Issues and Solutions for Microphone Cable Performance
Microphone cables play a crucial role in sound quality. However, users often face challenges. Poor connections can lead to unwanted noise. This issue may stem from wear and tear on connectors. Regular inspection can help catch problems early. If you notice crackling sounds, check the cable's integrity. A simple wiggle test can reveal hidden flaws.
Another common issue is signal interference, often caused by electromagnetic fields. Shielding can address this, but not all cables have adequate protection. When setting up, keep cables away from power sources. Use high-quality cables designed for performance. It's not just about the price; the right materials matter for optimal sound.
Lastly, length can impact sound quality. Longer cables may pick up interference more easily. Try to use the shortest practical length needed for your setup. If you’re experiencing dropouts or distortion, consider the cable length as a factor. Reflecting on your cable choices can lead to significant improvements in overall audio clarity.