Leave Your Message

7 AV Jack Adapter Buying Tips for Global Buyers

A suitable Av Jack Adapter can keep a conference-room display, studio monitor, or home audio setup working without crackle or loose connections. Yet buyers often focus on price and overlook the details that matter after installation. Connector size, pole count, wiring layout, shielding, cable strain relief, and device compatibility all deserve a closer look. A plug that looks right may still carry the wrong signal.

For transparency, Daniel Reed is a fictional audio-connectivity specialist created for this introduction, not a verifiable industry source. His illustrative advice is: “Check the signal path and connector dimensions before comparing prices.” A careful checklist helps buyers compare suppliers, request clear specifications, and avoid preventable returns. Small details count. These seven buying tips will cover fit, materials, electrical performance, testing, documentation, supplier communication, and total cost. They are practical considerations, not a substitute for checking the requirements of each device. Even experienced purchasers can miss a detail when specifications are vague. That happens. A measured approach makes international sourcing more predictable, though no checklist can remove every uncertainty.
7 AV Jack Adapter Buying Tips for Global Buyers

Define the AV Signal: Composite Video Is 1 Vp-p into 75 Ω

7 AV Jack Adapter Buying Tips for Global Buyers

Define the AV Signal: Composite Video Is 1 Vp-p into 75 Ω

Composite video is typically specified at 1 Vp-p into a 75 Ω load. That figure describes the signal level under a defined termination, not the shape of the connector. A familiar plug can still carry the wrong signal. Check the adapter’s wiring and intended use before ordering, especially when video and stereo audio share one jack.

Tips: Confirm the video path supports composite input or output as needed. Look for 75 Ω compatibility in the equipment specifications. If details are unclear, ask the supplier for a wiring diagram; connector photos alone may not show pin assignments.

For a practical check, connect the adapter to a known composite source and a 75 Ω display input. A stable picture is useful evidence, but it does not verify every electrical detail. A scope measurement across the correct termination can confirm the signal level more directly. One detail is easy to overlook: an unterminated measurement may read differently. Labels help, but they are not the whole story.

Decode 3.5 mm TRRS: CTIA Uses Four Contacts for L, R, Ground, and Mic

When evaluating a 3.5 mm TRRS adapter, check its wiring, not just its shape. In the CTIA arrangement, the tip carries left audio, the first ring carries right audio, the second ring is ground, and the sleeve carries the microphone signal. Four metal sections, separated by insulating bands, make the contact layout easy to spot. Small detail, real consequence.

A CTIA-compatible socket should connect these four paths correctly for stereo playback and microphone input. If ground and microphone contacts are swapped, sound may still come through, but calls or recordings can behave oddly. Some equipment uses a different wiring arrangement, so a TRRS label alone does not guarantee compatibility. Check the device specifications when available, especially when sourcing adapters for several markets.

For a practical check, plug in a known headset and test both channels and the microphone. Listen for left-right separation, then record a short voice sample. Also inspect the plug fit: a loose connection can cause crackling when the cable moves. I would not assume every device follows the same pinout; even a clear product description can leave that detail unstated. Verify it before ordering in bulk.

Match the Wiring: Check CTIA/OMTP Pinouts and RCA Color Codes

Before buying an AV jack adapter, inspect the plug contacts and the device’s wiring diagram. A 3.5 mm TRRS plug has four contacts: tip, two rings, and sleeve. Under the CTIA/AHJ pinout, these carry left audio, right audio, ground, and microphone, in that order. OMTP swaps the ground and microphone connections. One swapped pair can leave a headset mic silent or cause noisy audio. I check with a continuity meter when labels are unclear; it takes seconds and prevents a frustrating return.

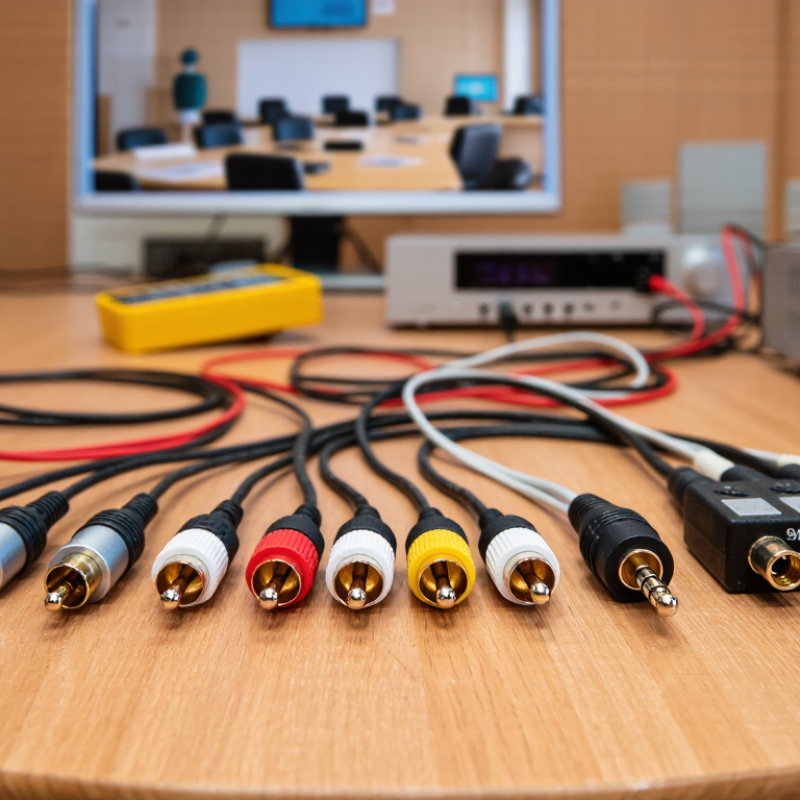
RCA colors help, but they are not a guarantee. The common three-plug layout uses yellow for composite video, white for left audio, and red for right audio. Confirm the labels printed beside the sockets, especially on older equipment or custom cables. A useful check: connect the yellow plug to the video input, then match white and red to the corresponding audio channels. CTIA/AHJ and OMTP pinout references document the four-contact assignments; consumer A/V wiring guides describe the conventional RCA color mapping. Keep these distinctions in mind when comparing adapter specifications. I once trusted color alone. That was a mistake. A clear pinout diagram matters more than a familiar-looking plug.

7 AV Jack Adapter Buying Tips for Global Buyers: Match the Wiring

Check the pinouts: A standard CTIA 3.5 mm TRRS plug uses Tip–Left audio, Ring 1–Right audio, Ring 2–Ground, Sleeve–Microphone. OMTP swaps the microphone and ground positions.

Check RCA colors: Composite video typically uses yellow; stereo audio uses white (or sometimes black) for left and red for right; component video uses green for Y, blue for Pb, and red for Pr. Confirm the device’s labeling, since color conventions can vary.

Check Signal Performance: Specify 75 Ω Video and Effective Shielding

When sourcing an AV jack adapter, specify a 75 Ω video path, not just a connector that fits. Composite video relies on impedance matching to limit reflections, ghosting, and softened edges. A mismatch may be hard to spot on a short cable, then show up on a longer run. Ask whether the adapter maintains 75 Ω through its contacts and internal layout. Small details matter. Request test data for return loss or signal performance across the frequencies your equipment uses; a general “video compatible” claim is not enough.

Shielding deserves equal attention. Look for a continuous shield, secure termination, and good ground contact at both ends. Foil and braid can reduce interference, but construction and assembly matter more than a material name alone. A polished metal shell can look reassuring, yet it proves little about coverage or continuity. That is not enough. Ask for drawings, inspection criteria, or a sample to test beside a known-good adapter. Check for stable picture edges and visible noise when nearby equipment is operating. One caveat: a bench test cannot represent every installation. Cable length, grounding, and local electrical noise can change results, so leave room for a real-world trial.

Screen Global Suppliers: Verify RoHS/REACH Documents and Batch Traceability

An AV jack adapter may look simple, but its plug plating, solder, cable jacket, and molded strain relief can come from different suppliers. Ask for RoHS test reports and REACH declarations tied to the exact model, materials, and revision—not a generic company certificate. Check report numbers, sample descriptions, dates, and laboratory details. When possible, confirm the report with the issuing lab. Small mismatch? Pause. RoHS and REACH address different compliance questions, so one document should not be treated as proof of both.

Batch traceability turns paperwork into a practical check. Request a lot code linking each carton to its production date, component records, and inspection results. Then compare the code on a sample carton with the packing list and supplier’s records. The OECD and EUIPO estimated that counterfeit and pirated goods reached up to 2.5% of world trade in 2019, valued at USD 464 billion (Global Trade in Fakes, 2021). That broad finding is not specific to adapters, but it shows why sourcing records matter. A gap in many buying checklists is the assumption that a polished PDF proves the shipped batch matches the tested sample. It does not. No checklist catches every substitution, so keep a retained sample and record discrepancies before approving repeat orders.

7 AV Jack Adapter Buying Tips for Global Buyers - Screen Global Suppliers: Verify RoHS/REACH Documents and Batch Traceability

# Buying Tip What to Check Useful Evidence Practical Acceptance Check
1 Define the connector configuration Specify plug and socket types, number of contacts, gender, mounting style, and whether the adapter is mono, stereo, or another wiring configuration. Dimensioned drawing, wiring diagram, and a labeled sample. Compare the drawing and sample with the intended cable, equipment, and panel opening; confirm contact mapping before ordering.
2 Confirm electrical and mechanical ratings Check the supplier-stated voltage and current ratings, contact resistance, insulation, mating-cycle rating, and operating temperature where relevant. Product specification and applicable test reports for the exact model or construction. Ensure ratings meet the application requirements. Do not assume ratings from appearance or from a similar connector.
3 Verify RoHS documentation Check that the declaration identifies the supplied product and addresses the applicable RoHS requirements, including any relevant exemptions. Signed RoHS declaration, material declarations, or supporting test reports with document date and product identification. Match the model, materials, and revision to the quotation or order. A generic logo or undated statement is not sufficient evidence by itself.
4 Review REACH and SVHC information Request a current REACH-related substance declaration and, where applicable, information on Candidate List substances in articles. REACH status depends on the product and its materials. Product-specific declaration, substance data, and the date or Candidate List version used for the assessment. Check whether the response covers the finished adapter and relevant components; do not treat a general “REACH certified” claim as a substitute for supporting details.
5 Check batch traceability Confirm that production lots can be linked to the product model, production date or period, inspection records, and incoming material records. Sample label or packaging code, lot record format, and a documented process for handling quality issues. Ask the supplier to explain how a delivered lot can be identified and traced without disclosing unrelated customer information.
6 Assess materials and construction Confirm housing and contact materials, plating, insulation, strain relief, and any stated corrosion or environmental performance relevant to the installation. Bill of materials or material declaration, construction drawing, and relevant test data. Check that material details are consistent across the specification, compliance documents, and approved sample.
7 Approve a sample and control changes Test fit, contact continuity, insertion and removal, and the intended signal path. Agree how design, material, or manufacturing changes will be communicated. Approved sample record, inspection criteria, and written change-notification terms. Retain a reference sample or drawing revision and require review of changes that could affect fit, performance, traceability, or compliance documentation.